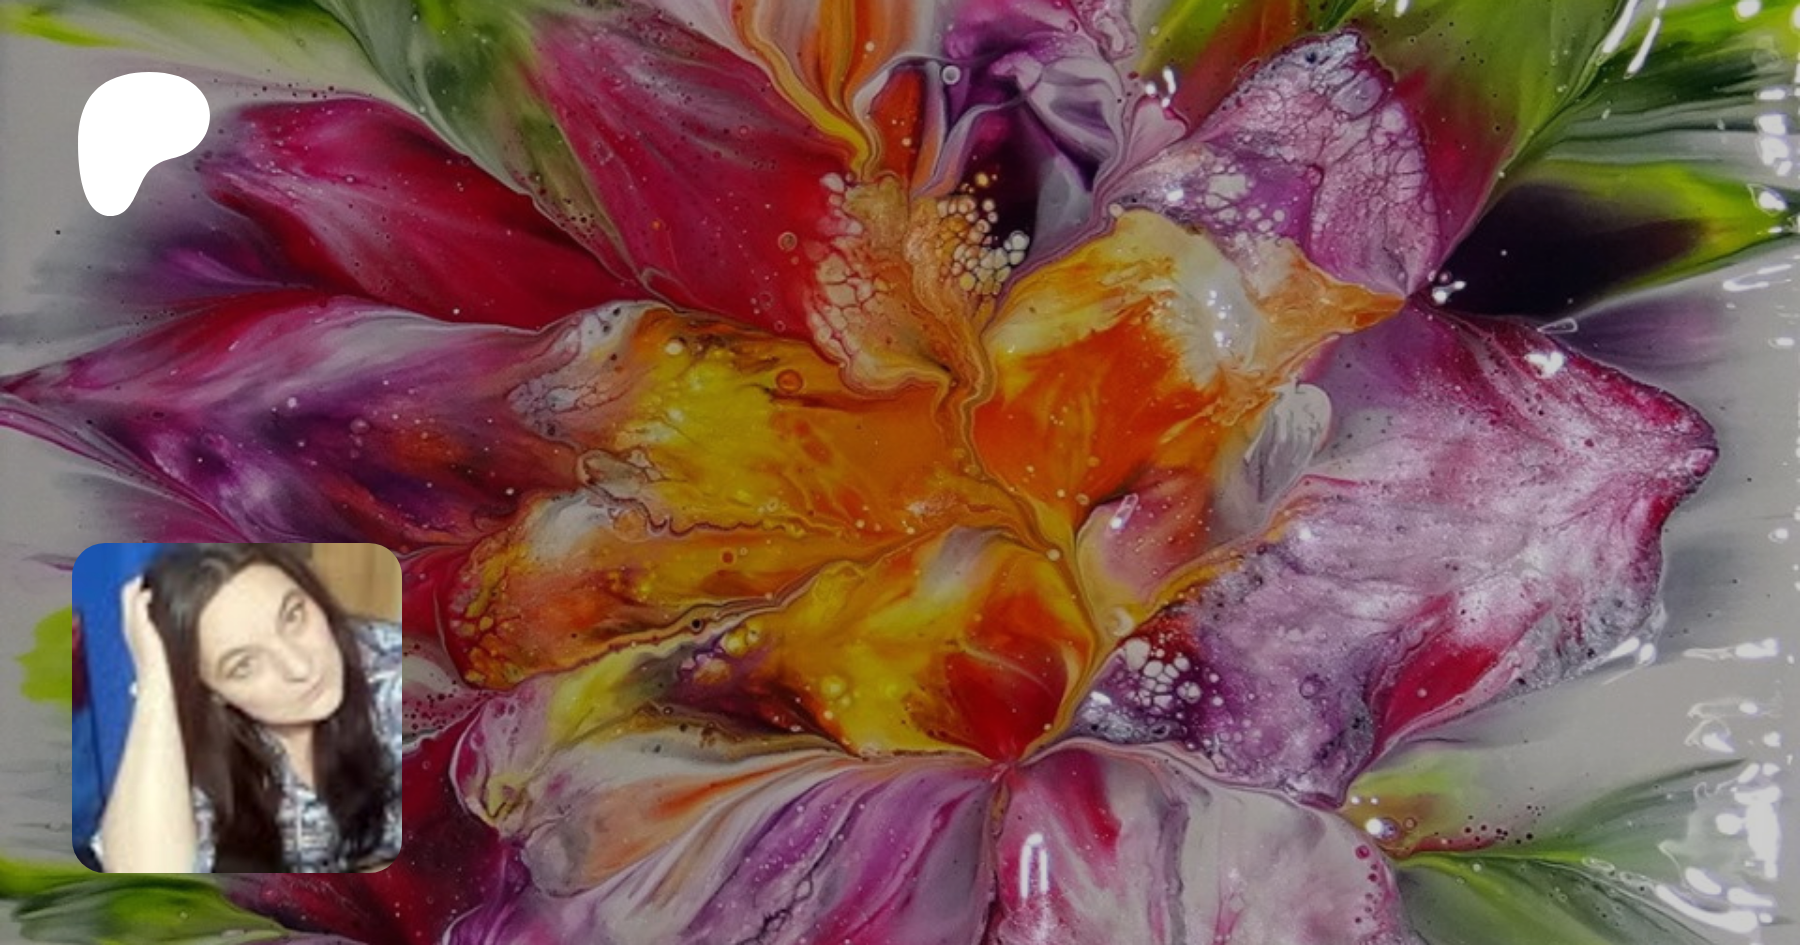
8 small SPLIT CUP pours on one canvas ~ AWESOME Acrylic pour painting ~ Spin art

One of my viewers Anna ask me to do multiple small split cups pours on one canvas. I found this idea so interesting, that I have to give it a try and result is just AWESOME!

TECHNIQUE: Split cup pour, Spin art, Straight pour


MATERIAL:
- 10x12 inch gallery wrapped canvas
- Acrylic paints mixed with pouring medium
- Cake spinner
- Palete knife
- Split cup
COLOURS:
- Amsterdam expert series indanthrene blue
- Pebeo iridescent precious gold
- Pebeo iridescent blue green
- Golden payne's gray
2yt.JPG
All my paints are mixed with Boesner Guardi acrylic binder and acrylic emulsion.
If you are interested in ONLINE PRIVATE CLASSES, you can contact me via Facebook Fiona Art or email zemljicr@gmail.com.
Please understand that I am in no way responsible for the way you use your paint and mediums. Follow all safety instructions of the manufacturers, I can not be held liable.
Be careful and use the proper materials for your safety.

You can't use any content on my channel, unless I give you a permission!
 
Acrylic pour FLOWER painting ~ CUP BOTTOM reverse flower dip
It's been a while, since I did a cup bottom reverse flower dip, so I was kind of nervous.
But obviously I worried too much, because this acrylic pour flower painting turned out gorgeous.

TECHNIQUE: Reverse flower dip with paper napkin, Cup bottom pour


COLOURS:
- Boesner black
- Amsterdam special series cadmium red deep
- Amsterdam reflex orange
- Decoart extreme sheen gold
- Pearl white

My pearl white mixture:
1 part Vallejo pearl medium
1 part titanium white
2 parts pouring medium
All my paints are mixed with Boesner Guardi acrylic binder and acrylic emulsion.
PROCESS:
- Pour your base on canvas
- Put your FLOWER SHAPED DESERT CUP on the canvas with bottom up
- Pour paints on the bottom and use PEARL WHITE or some metallic paints between each colour to create petal - lacing effect
- Take off the cup
- Use SKEWER to draw some petal shapes
- Gently put PAPER NAPKIN or towel on canvas ( You can use dry or damped napkin)
- Lift one corner at the time and then gently lift it (the middle last)
- Torch it for air bubbles and to activate pearl white and metallic paints
- And here is your flower :)

MATERIAL I USED:
- 10x10 inch canvas
- Acrylic paints mixed with pouring medium
- Flower shaped desert cup
- Paper napkin or towel
- Wooden skewer
- Palete knife
- Torch
3.JPG
If you are interested in ONLINE PRIVATE CLASSES, you can contact me via Facebook Fiona Art or email zemljicr@gmail.com.
Please understand that I am in no way responsible for the way you use your paint and mediums. Follow all safety instructions of the manufacturers, I can not be held liable.
Be careful and use the proper materials for your safety.

You can't use any content on my channel, unless I give you a permission!
 
Tree of fire ~ SPLIT CUP acrylic pour painting ~ Spin art ~ Straight pour
I had some colours left from my cup bottom pour and I used the same colour combo for this Split cup acrylic pour painting. I wasn't sure at first, if I like it or not, but after few minutes I feel in love with this fire tree. :D

TECHNIQUE: Split cup pour, Spin art, Straight pour
MATERIAL:
- 12x12 inch gallery wrapped canvas
- Acrylic paints mixed with pouring medium
- Cake spinner
- Palete knife
- Split cup
COLOURS:
- Boesner black
- Amsterdam special series cadmium red deep
- Amsterdam reflex orange
- Decoart extreme sheen gold
1yt.JPG
All my paints are mixed with Boesner Guardi acrylic binder and acrylic emulsion.
If you are interested in ONLINE PRIVATE CLASSES, you can contact me via Facebook Fiona Art or email zemljicr@gmail.com.
Please understand that I am in no way responsible for the way you use your paint and mediums. Follow all safety instructions of the manufacturers, I can not be held liable.
Be careful and use the proper materials for your safety.

You can't use any content on my channel, unless I give you a permission!
 

Attachments

  • YT460__2.jpg
    YT460__2.jpg
    62.4 KB · Views: 1
AMAZING acrylic pour FLOWER painting ~ CUP BOTTOM technique ~ Acrylic pouring tutorial
You must see this AMAZING acrylic pour FLOWER painting!!! When I was choosing colors, I said to myself, that this one will be for women only, because men don't like this color combo. Hehe... I apologise to all those men, who will like it. ;)

PROCESS:
- Pour your base on canvas
- Put your FLOWER SHAPED DESERT CUP on the canvas with bottom up
- Pour paints on the bottom and use PEARL WHITE or some metallic paints between each colour to create petal - lacing effect
- Take off the cup
- Use SKEWER to draw some petal shapes
- Gently put PAPER NAPKIN or towel on canvas ( You can use dry or damped napkin)
- Lift one corner at the time and then gently lift it (the middle last)
- Torch it for air bubbles and to activate pearl white and metallic paints
- And here is your flower :)
TECHNIQUE: Reverse flower dip with paper napkin, Cup bottom pour

MATERIAL I USED:
- 12x12 inch canvas
- Acrylic paints mixed with pouring medium
- Flower shaped desert cup
- Paper napkin or towel
- Wooden skewer
- Palete knife
- Torch

COLOURS I USED:
- Boesner black for the base coat
- Extreme sheen safire blue
- Extreme sheen gold
- Windsor & Newton opera rose
- Amsterdam expert series Sèvres Blue
- Amsterdam expert series indathrene blue
- Liquitex heavy body quinacridone blue violet
- Pearl white

My pearl white mixture:
1 part Vallejo pearl medium
1 part titanium white
2 parts pouring medium
All my paints are mixed with Boesner Guardi acrylic binder and acrylic emulsion.
2.JPG
If you are interested in ONLINE PRIVATE CLASSES, you can contact me via Facebook Fiona Art or email zemljicr@gmail.com.
Please understand that I am in no way responsible for the way you use your paint and mediums. Follow all safety instructions of the manufacturers, I can not be held liable.
Be careful and use the proper materials for your safety.

You can't use any content on my channel, unless I give you a permission!
 
NEW TECHNIQUE ?!? ~ Lacy split cup straight pour ~ Acrylic pour painting ~ Must see!

I was playing with paints today and I did a split cup straight pour that I didn't like, so I "sprinkled" ( I don't know the right word) it with silicone oil. And waw... I got a beautiful lacy looking painting, that it looks like you would look into the water.

TECHNIQUE: Split cup pour, Spin art, Straight pour
MATERIAL:
- 12x12 inch gallery wrapped canvas
- Acrylic paints mixed with pouring medium
- Cake spinner
- Palete knife
- Split cup
- Silicone oil
COLOURS:
- Amsterdam greenish blue
- Amsterdam permanent blue violet
- Amsterdam yellowish green
- Pebeo iridescent blue green
2.JPG
All my paints are mixed with Boesner Guardi acrylic binder and acrylic emulsion
If you are interested in ONLINE PRIVATE CLASSES, you can contact me via Facebook Fiona Art or email zemljicr@gmail.com.
Please understand that I am in no way responsible for the way you use your paint and mediums. Follow all safety instructions of the manufacturers, I can not be held liable.
Be careful and use the proper materials for your safety.

You can't use any content on my channel, unless I give you a permission!
 
Acrylic pouring ~ Copper, Gold, Black and White ~ Split cup straight pour

I started this pour with a plan, that I will sprinkle some silicone oil at the end for a kind of pixelated look. But when I saw all those gorgeous lines and beautiful tree and grass floating in the wind, I decided to leave it... This happened to be the second time, that I liked it too much to experiment with silicone oil. So obviously this sprinkled silicone oil technique will be just for pours that I will not like. ;
TECHNIQUE: Split cup pour, Spin art, Straight pour


MATERIAL:
- 12x12 inch canvas
- Acrylic paints mixed with pouring medium
- Cake spinner
- Palete knife
- Split cup
COLOURS:
- Boesner black
- Pebeo iridescent copper
- Pebeo iridescent precious gold
- Boesner titanium white
3.jpg
All my paints are mixed with Boesner Guardi acrylic binder and acrylic emulsion.
If you are interested in ONLINE PRIVATE CLASSES, you can contact me via Facebook Fiona Art or email zemljicr@gmail.com.
Please understand that I am in no way responsible for the way you use your paint and mediums. Follow all safety instructions of the manufacturers, I can not be held liable.
Be careful and use the proper materials for your safety.

You can't use any content on my channel, unless I give you a permission!
 
STAINED GLASS ~ Rainbow flower ~ Acrylic pour painting with silicone oil ~ Open cup
I did STAINED GLASS painting a while ago and I think that I will try this again, but this time just sprinkle silicone oil on top. I almost didn't do it, because I like it before the silicone too, but I want to do this, just to see, if I can get the stained glass looking rainbow flower.
I will definitely do one without silicone too in the near future. :D

TECHNIQUE: Open cup, Spin art


COLOURS:
- Boesner black
- Amsterdam payrolle red
- Amsterdam azo yellow lemon
- Pebeo iridescent precious gold
- Amsterdam indathrene blue
- Golden teal

MATERIAL I USED:
- 12x12 inch canvas
- Acrylic paints mixed with pouring medium
- Flower shaped desert cup
- Palete knife
- Cake spinner
- Torch

PROCESS:
- Pour a puddle of base colour in the middle of the canvas
- Place down flower shaped cup in the middle of this puddle
- Layering colours of your choice
- Lift up the cup
- Rework your center if needed
- Torch
- Spin
- Sprinkle silicone oil with your fingers on the surface
2.JPG
All my paints are mixed with Boesner Guardi acrylic binder and acrylic emulsion.
If you are interested in ONLINE PRIVATE CLASSES, you can contact me via Facebook Fiona Art or email zemljicr@gmail.com.
Please understand that I am in no way responsible for the way you use your paint and mediums. Follow all safety instructions of the manufacturers, I can not be held liable.
Be careful and use the proper materials for your safety.

You can't use any content on my channel, unless I give you a permission!
 
Acrylic pouring ~ Cup bottom reverse dip ~ Pastel colours ~ Acrylic pour flower painting
Flower shaped cup bottom reverse flower dip with pastel colours

TECHNIQUE: Reverse flower dip with paper napkin, Cup bottom pour


PROCESS:
- Pour your base on canvas
- Put your FLOWER SHAPED DESERT CUP on the canvas with bottom up
- Pour paints on the bottom and use PEARL WHITE or some metallic paints between each colour to create petal - lacing effect
- Take off the cup
- Use SKEWER to draw some petal shapes
- Gently put PAPER NAPKIN or towel on canvas ( You can use dry or damped napkin)
- Lift one corner at the time and then gently lift it (the middle last)
- Torch it for air bubbles and to activate pearl white and metallic paints
- And here is your flower :)

MATERIAL:
- 10x10 inch canvas
- Acrylic paints mixed with pouring medium
- Flower shaped desert cup
- Paper napkin or towel
- Wooden skewer
- Palete knife
- Torch

COLOURS:
- Boesner black for the base coat
- Windsor & Newton powder blue
- Vallejo iridescent violet
- Vallejo cobalt violet hue
- Pebeo iridescent blue black
- Pearl white

My pearl white mixture:
1 part Vallejo pearl medium
1 part titanium white
2 parts pouring medium
1yt.JPG
All my paints are mixed with Boesner Guardi acrylic binder and acrylic emulsion.
If you are interested in ONLINE PRIVATE CLASSES, you can contact me via Facebook Fiona Art or email zemljicr@gmail.com.
Please understand that I am in no way responsible for the way you use your paint and mediums. Follow all safety instructions of the manufacturers, I can not be held liable.
Be careful and use the proper materials for your safety.

You can't use any content on my channel, unless I give you a permission!
 
Acrylic pouring for BEGINNERS ~ BALLOON DIP ~ Arteza products review ~ Step by step tutorial
I will publish one video a week, where I will demonstrate acrylic pouring techniques for beginners. It will be step by step tutorials, with all the information.
My first technique is a balloon dip, because this is the easiest way to do an abstract flower painting.

TECHNIQUE: Balloon dip (Glove dip)


PROCESS:
- Pour your base on canvas
- Make puddles with your colours
- Dip balloon or glove on the puddles
- Lift it straight up or sideway
- And here is your flower

MATERIAL:
- 10x12 inch canvas
- Acrylic paints mixed with pouring medium
- Balloon or glove
- Paper napkin or towel
- Wooden skewer
- Palete knife
- Torch

COLOURS:
- Boesner titanium white
- Arteza pearl marmelade
- Arteza pearl deep brown
- Arteza gold
- Pearl white
5.JPG
My pearl white mixture:
1 part Vallejo pearl medium
1 part titanium white
2 parts pouring medium
All my paints are mixed with Boesner Guardi acrylic binder and acrylic emulsion.

Link to split cup:
...
Use this Discount code at checkout to get 15% off all cups! The code is FIONA15

I'm happy to provide you with a new Arteza 10% off coupon code FionaArt4 valid until September 10.

My Arteza affiliate link:
For USA:
...

For Europe:
...

My mixing paints video:

#FionaArt #BalloonDip #AcrylicPour

If you are interested in ONLINE PRIVATE CLASSES, you can contact me via Facebook Fiona Art or email zemljicr@gmail.com.

If you want to support my channel to keep on experimenting with new techniques you can do it through this link:


Or just like and subscribe to show some love.
Thank you!

You can follow me on
Facebok: https://www.facebook.com/Fionas-Art-b...

Instagram: @fionaacrylic

My personal page: https://fionaart.si/
3.JPG
Please understand that I am in no way responsible for the way you use your paint and mediums. Follow all safety instructions of the manufacturers, I can not be held liable.
Be careful and use the proper materials for your safety.

You can't use any content on my channel, unless I give you a permission!
 
Easy flower painting with CHAMELEON CELLS

1.JPG

TECHNIQUE: Chameleon cells pour, Flip cup
PROCESS:
- Layer paints into the cup
- Flip your cup on the canvas
- Tilt
- Use a skewer or toothpick to apply silicone oil
- Wait for cells to develop
COLOURS:
- Amsterdam titanium white
- Amsterdam permanent blue violet
- Vallejo quinacridone magenta
- Arties colours cadmium orange hue
MATERIAL I USED:
- 8x8 inch canvas
- Acrylic paints mixed with pouring medium
- Palete knife
- Skewer
- Silicone oil
- Torch


TIME STAMPS:
0:00 - 1:00 Intro
1:00 - 3:00 Layering paints into the cup
3:00 - 6:00 Flip cup
6:00 - 8:20 Tilting paint
8:20 - 13:38 Applying silicone oil to create chameleon cells
13:40 - 15:12 Close up
All my paints are mixed with Boesner Guardi acrylic binder and acrylic emulsion.
My mixing paints video:
I'm happy to provide you with a new Arteza 10% off coupon code FionaArt4 valid until September 10.
My Arteza affiliate link:
For USA:
...
For Europe:
...
Link to SPLIT CUP and NEW FLOWER SHAPED CUP (It comes in 2 pieces allowing you to pour onto the top piece and let it flow down the sides in the traditional way, or you can pour directly into the base without the top piece for a different effect. Both work extremely well):
...
Use this Discount code at checkout to get 15% off all cups! The code is FIONA15
If you are interested in ONLINE PRIVATE CLASSES, you can contact me via Facebook Fiona Art or email zemljicr@gmail.com.
If you want to support my channel to keep on experimenting with new techniques you can do it through this link:
Or just like and subscribe to show some love.
Thank you!
You can follow me on
Facebok: https://www.facebook.com/Fionas-Art-b...
Instagram: @fionaacrylic
My personal page: https://fionaart.si/
2.JPG
Please understand that I am in no way responsible for the way you use your paint and mediums. Follow all safety instructions of the manufacturers, I can not be held liable.
Be careful and use the proper materials for your safety.
You can't use any content on my channel, unless I give you a permission!
 
Back
Top