Pour over a GLASS bottom ~ Reverse flower dip with paper napkin ~ Acrylic pour flower
Today I didn't used flower shaped cup or bottle bottom for this reverse flower dip with paper napkin. I found a glass with eight spaces for paint to flow off and it created beautiful eight petal flower.

TECHNIQUE: Reverse flower dip with paper napkin, Glass bottom pour, Cup bottom pour, Bottle bottom pour
PROCESS:
- Pour your base on canvas
- Put your GLASS on the canvas with bottom up
- Pour paints on the bottom and use PEARL WHITE or some metallic paints between each colour to create petal - lacing effect
- Take off the glass
- Use SKEWER to draw some petal shapes
- Gently put PAPER NAPKIN or towel on canvas ( You can use dry or damped napkin)
- Lift one corner at the time and then gently lift it (the middle last)
- Torch it for air bubbles and to activate pearl white and metallic paints
- And here is your flower :)

MATERIAL:
- 10x10 inch canvas
- Acrylic paints mixed with pouring medium
- Glass
- Paper napkin or towel
- Wooden skewer
- Palete knife
- Torch

COLOURS:
- Boesner black for the base coat
- DecoArt Extreme sheen saphire mixed with Amsterdam magenta
- Amsterdam reflex rose
- Amsterdam ultramarine violet
- Amsterdam sky blue light
- Pearl white
4.jpg
My pearl white mixture:
1 part Vallejo pearl medium
1 part titanium white
2 parts pouring medium
All my paints are mixed with Boesner Guardi acrylic binder and acrylic emulsion.
Please understand that I am in no way responsible for the way you use your paint and mediums. Follow all safety instructions of the manufacturers, I can not be held liable.
Be careful and use the proper materials for your safety.
You can't use any content on my channel, unless I give you a permission!
 
Pink Dragon ~ Bloom technique ~ Acrylic pour painting ~ Trying my pouring medium
It was a day for experiments again, so I mixed some paints for bloom technique with supplies that I have and get my recipe for this technique.
I wasn't sure about those two paintings, when I poured them, but now I really love them... especially Pink Dragon. ;)


COLOURS:
* Boesner white with GAC800 and some water for a pillow
* Amsterdam permanent red violet
Amsterdam reflex pink
Pebeo iridescent precious gold
ArtAlchemy true turquoise
I mixed pigments with my pouring medium (3 parts Boesner acrylic binder, 0,5 part of Vallejo polyurethane gloss varnish and 0,5 part of Vallejo polyurethane satin varnish)
* Cell activators:
Amsterdam titanium white and Amsterdam lamp black mixed with 3 parts of my pouring medium (70% Boesner acrylic binder and 30% Dufa acrylic emulsion).

MATERIAL:
- 6x6 inch canvas
- Straw
- Wooden skewer
- Palete knife
- Cake spinner
- Torch
1yt.JPG
Please understand that I am in no way responsible for the way you use your paint and mediums. Follow all safety instructions of the manufacturers, I can not be held liable.
Be careful and use the proper materials for your safety.

You can't use any content on my channel, unless I give you a permission!
 
BLACK & WHITE & GOLD ~ Cup bottom Reverse flower dip ~ Acrylic pour painting

For this cup bottom reverse dip with paper napkin I used only 3 colours: black, white and gold and I got really beautiful 3d looking flower.

PROCESS:
- Pour your base on canvas
- Put your 3D PRINTED FLOWER SHAPED CUP on the canvas with bottom up
- Pour paints on the bottom and use PEARL WHITE or some metallic paints between each colour to create petal - lacing effect
- Take off the cup
- Use SKEWER to draw some petal shapes
- Gently put PAPER NAPKIN or towel on canvas ( You can use dry or damped napkin)
- Lift one corner at the time and then gently lift it (the middle last)
- Torch it for air bubbles and to activate pearl white and metallic paints
- And here is your flower :)
TECHNIQUE: Reverse flower dip with paper napkin, Cup bottom pour, Bottle bottom pour

MATERIAL:
- 10x10 inch canvas
- Acrylic paints mixed with pouring medium
- 3D PRINTED Flower shaped cup
- Paper napkin or towel
- Wooden skewer
- Palete knife
- Torch

COLOURS:
- Boesner black
- Pebeo iridescent precious gold
- Pearl white
1yt.JPG
My pearl white mixture:
1 part Vallejo pearl medium
1 part titanium white
2 parts pouring medium
All my paints are mixed with Boesner Guardi acrylic binder and acrylic emulsion.
Please understand that I am in no way responsible for the way you use your paint and mediums. Follow all safety instructions of the manufacturers, I can not be held liable.
Be careful and use the proper materials for your safety.
You can't use any content on my channel, unless I give you a permission!
 
Holidays are not fair away, so I I would like to show you, how you can make gorgeous coasters set in just few minutes.

TECHNIQUE: Dip technique
COLOURS:
* Boesner white with GAC800 and some water for a base
* Amsterdam permanent red violet
Amsterdam copper
Windsor&Newton windsor violet
Art Alchemy rich turquoise
I mixed pants with my pouring medium (3 parts Boesner acrylic binder, 0,5 part of Vallejo polyurethane gloss varnish and 0,5 part of Vallejo polyurethane satin varnish)
* Cell activator:
Amsterdam titanium white mixed with 3 parts of my pouring medium (70% Boesner acrylic binder and 30% Dufa acrylic emulsion).

MATERIAL:
- 4x4 inch MDF coasters
- Paints
2.jpg
My mixing paints video:

#FionaArt #CoastersDiy #AcrylicPour

If you want to support my channel to keep on experimenting with new techniques you can do it through this link:


Or just like and subscribe to show some love.
Thank you!
2yt.jpg
You can follow me on
Facebok: https://www.facebook.com/Fionas-Art-b...

Instagram: @fionaacrylic

My personal page: https://fionaart.si/
3yt.jpg
Please understand that I am in no way responsible for the way you use your paint and mediums. Follow all safety instructions of the manufacturers, I can not be held liable.
Be careful and use the proper materials for your safety.

You can't use any content on my channel, unless I give you a permission!
 
Mysterious Lady in Flower garden ~ Do you see her? ~ Acrylic pour painting

Few month ago I did this painting with mallet smash technique. I have it on my wall since then, but yesterday I was sitting in my studio and this Mysterious Lady looked at me from the painting. Obviously my Mom looking after me from this beautiful Flower garden over the Rainbow.

MATERIAL I USED:
- 12x12 inch wooden board canvas
- Acrylic paints mixed with pouring medium
- Mallets
- Torch


PROCESS:
- Pour your base on canvas
- Make some puddles of paint
- Smash with a mallet

COLOURS I USED:
- Boesner black for the base coat
- Arties colours cadmium yellow lemon hue
- Amsterdam carmine
- Amsterdam yellowish green
- Amsterdam permanent green deep
- Windsor&Newton permanent magenta
- Pearl white

My pearl white mixture:
1 part Vallejo pearl medium
1 part titanium white
2 parts pouring medium
mysterious lady (6).jpg
All my paints are mixed with Boesner Guardi acrylic binder and acrylic emulsion.
Please understand that I am in no way responsible for the way you use your paint and mediums. Follow all safety instructions of the manufacturers, I can not be held liable.
Be careful and use the proper materials for your safety.
You can't use any content on my channel, unless I give you a permission!
 
DOUBLE dip ~ EASY pour for BEGINNERS ~ Acrylic pour painting ~ Step by step tutorial

I will publish one video a week, where I will demonstrate acrylic pouring techniques for beginners.
It will be step by step tutorials, with all the information.
This time I will show you how to create diptych acrylic pour flower painting with easy double dip technique.

TECHNIQUE: Double dip, Dip technique acrylic pour

PROCESS:
- Pour your base on canvas
- Make stripes with your colours
- Pres the second canvas on top
- Split them apart

MATERIAL:
- 10x10 inch canvas
- Acrylic paints mixed with floetrol
- Wooden skewer
- Palete knife
- Torch
COLOURS:
- Boesner black and titanium white
- Arties colours cardinal red
- Amsterdam expert series karmin
- Abstract olive green light
- Amsterdam reflex orange
- Arteza indian yellow

All my paints are mixed with floetrol.

Link to split cup:
...
Use this Discount code at checkout to get 15% off all cups! The code is FIONA15

I'm happy to provide you with a new Arteza 10% off coupon code FionaArt4 valid until September 10.

My Arteza affiliate link:
For USA:
...

For Europe:
...

My mixing paints video:

#FionaArt #Diptych #AcrylicPour

If you want to support my channel to keep on experimenting with new techniques you can do it through this link:


Or just like and subscribe to show some love.
Thank you!

YT495___3.JPG

You can follow me on
Facebok: https://www.facebook.com/Fionas-Art-b...

Instagram: @fionaacrylic

My personal page: https://fionaart.si/

Please understand that I am in no way responsible for the way you use your paint and mediums. Follow all safety instructions of the manufacturers, I can not be held liable.
Be careful and use the proper materials for your safety.

You can't use any content on my channel, unless I give you a permission!
 
SIMPLE flower painting for BEGINNERS ~ Diptych acrylic pour painting ~ Dip technique

Dip technique is really simple way to do nice flower painting diptych. I like that there stayed some structure, which will be nice addition to this painting, when I will put a coat of resin on top.

TECHNIQUE: Double dip, Dip technique acrylic pour


PROCESS:
- Pour your base on canvas
- Make stripes with your colours
- Pres the second canvas on top
- Split them apart

MATERIAL:
- 10x10 inch canvas
- Acrylic paints mixed with pouring medium
- Wooden skewer
- Palete knife
- Torch
3.JPG
COLOURS:
* Boesner white with GAC800 and some water for a pillow
* Amsterdam permanent red violet
Primary elements payne's gray
PearlEx Pigment iridescent gold
Vallejo pearl medium
ArtAlchemy magic opal
Arteza iridescent shocking lime green
I mixed pigments with my pouring medium (3 parts Boesner acrylic binder, 0,5 part of Vallejo polyurethane gloss varnish and 0,5 part of Vallejo polyurethane satin varnish)
Please understand that I am in no way responsible for the way you use your paint and mediums. Follow all safety instructions of the manufacturers, I can not be held liable.
Be careful and use the proper materials for your safety.
You can't use any content on my channel, unless I give you a permission!
 
Wandering SPLIT cup straight pour ~ Landscape acrylic pour painting ~ Easy beginner technique
Here you can see easy acrylic pouring beginner technique for paint landscape. I see a river and mountains in a stormy day. What do you see?

TECHNIQUE: Wandering straight pour, Split cup pour


MATERIAL:
- 10x10 inch canvas
- Acrylic paints mixed with pouring medium
- Split cup (6oz)
- Wooden skewer
- Palete knife
- Torch
1yt.jpg
Please understand that I am in no way responsible for the way you use your paint and mediums. Follow all safety instructions of the manufacturers, I can not be held liable.
Be careful and use the proper materials for your safety.

You can't use any content on my channel, unless I give you a permission!
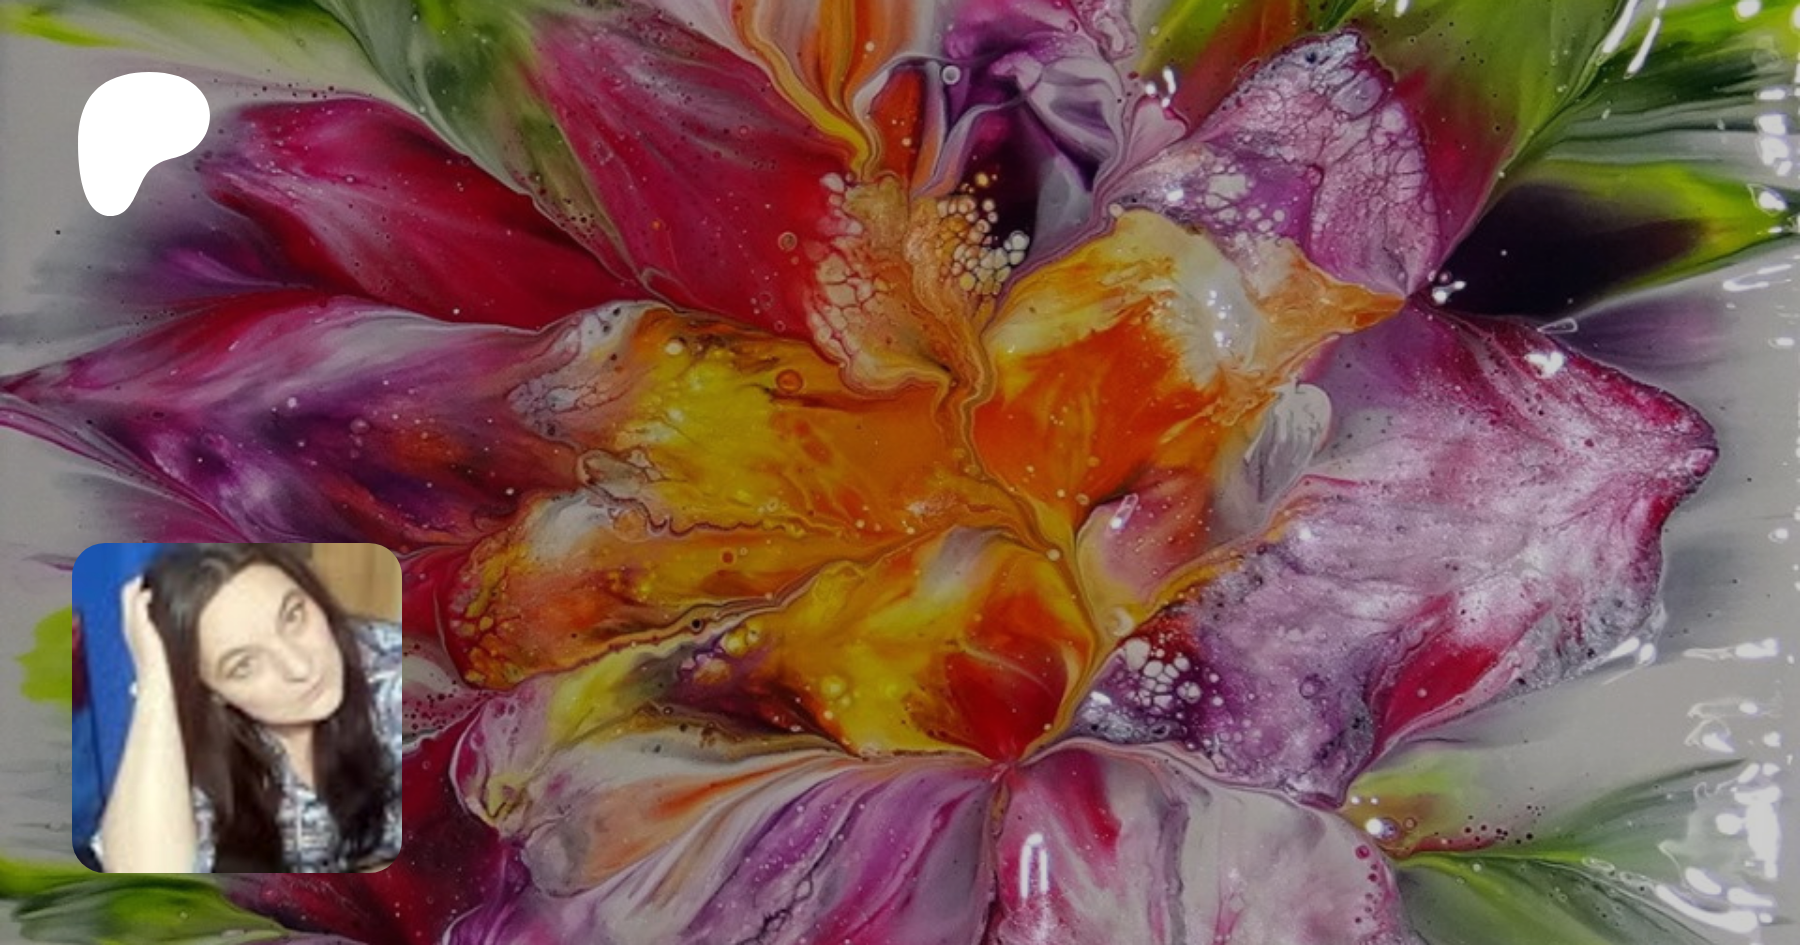
 
HOW TO paint a FLOWER with 3d printed CUP and paper NAPKIN ~ Paint #WithMe

With this 3D printed flower shaped cup, some paint mixed with pouring medium and paper napkin you can create a beautiful flower acrylic pour painting.

TECHNIQUE: Reverse flower dip with paper napkin, Cup bottom pour
PROCESS:
- Pour your base on canvas
- Put your 3D PRINTED FLOWER SHAPED CUP on the canvas with bottom up
- Pour paints on the bottom and use PEARL WHITE or some metallic paints between each colour to create petal - lacing effect
- Take off the cup
- Use SKEWER to draw some petal shapes
- Gently put PAPER NAPKIN or towel on canvas ( You can use dry or damped napkin)
- Lift one corner at the time and then gently lift it (the middle last)
- Torch it for air bubbles and to activate pearl white and metallic paints
- And here is your flower :)
MATERIAL:
- 10x10 inch canvas
- Acrylic paints mixed with pouring medium
- 3D PRINTED Flower shaped cup
- Paper napkin or towel
- Wooden skewer
- Palete knife
- Torch

COLOURS:
- Amsterdam greyish blue mixed with white for a base
- Amsterdam expert series permanent red violet
- Amsterdam venetian rose
- Amsterdam copper
- Pearl white
4.JPG
My pearl white mixture:
1 part Vallejo pearl medium
1 part titanium white
2 parts pouring medium
All my paints are mixed with Boesner Guardi acrylic binder and acrylic emulsion.
Please understand that I am in no way responsible for the way you use your paint and mediums. Follow all safety instructions of the manufacturers, I can not be held liable.
Be careful and use the proper materials for your safety.

You can't use any content on my channel, unless I give you a permission!
 
Wrecked bloom ~ Acrylic pour painting ~ Trying my pouring medium ~ Paint #WithMe

I'm still trying my pouring medium for bloom technique and I still have some problems, but I love the lacing in the middle and transparency of colours on the outside.

TECHIQUE: Wrecked bloom


COLOURS:
* Boesner white with GAC800 and some water for a pillow
* Amsterdam permanent red violet
Amsterdam reflex pink
Pebeo iridescent precious gold
ArtAlchemy rich turquoise
I mixed pigments with my pouring medium (3 parts Boesner acrylic binder, 0,5 part of Vallejo polyurethane gloss varnish and 0,5 part of Vallejo polyurethane satin varnish)
* Cell activators:
Amsterdam titanium white and Amsterdam lamp black mixed with 3 parts of my pouring medium (70% Boesner acrylic binder and 30% Dufa acrylic emulsion).

MATERIAL:
- 8x8 inch canvas
- Straw
- Wooden skewer
- Palete knife
- Cake spinner
- Torch

My mixing paints video:

#FionaArt #Bloom #AcrylicPour

Link to NEW FLOWER SHAPED CUP and SPLIT CUPS:
...
Use this Discount code at checkout to get 15% off all cups! The code is FIONA15

I'm happy to provide you with a new Arteza 10% off coupon code FionaArt4 valid until September 10.

My Arteza affiliate link:
For USA:
...

For Europe:
...

If you want to support my channel to keep on experimenting with new techniques you can do it through this link:


Or just like and subscribe to show some love.
Thank you!
YT499___1.jpg
You can follow me on
Facebok: https://www.facebook.com/Fionas-Art-b...

Instagram: @fionaacrylic

My personal page: https://fionaart.si/

Please understand that I am in no way responsible for the way you use your paint and mediums. Follow all safety instructions of the manufacturers, I can not be held liable.
Be careful and use the proper materials for your safety.

You can't use any content on my channel, unless I give you a permission!
 
Back
Top