Hey, guys! I know that YouTube banners can be a little tricky because the recommended resolution is odd and how YouTube formats them once uploaded can be a pain, but I figured I'd make a little thread to help explain/show the process more in hopes that it helps you!
(To the Admins; sorry if I posted this in the wrong place!)
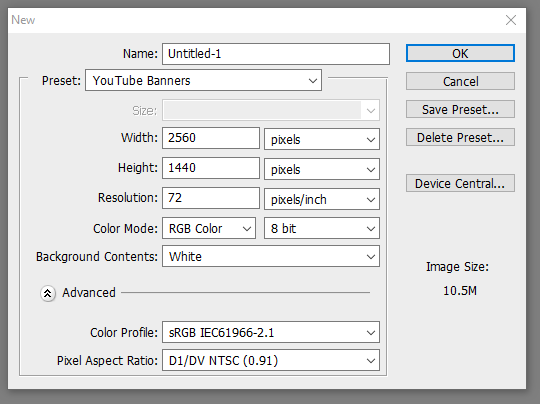
Step One: The resolution of a YouTube banner is recommended to be 2560x1440.
If you do not have Photoshop to open a new project of this size, go on Google and search for a background with those dimensions.
Picture of preset settings:
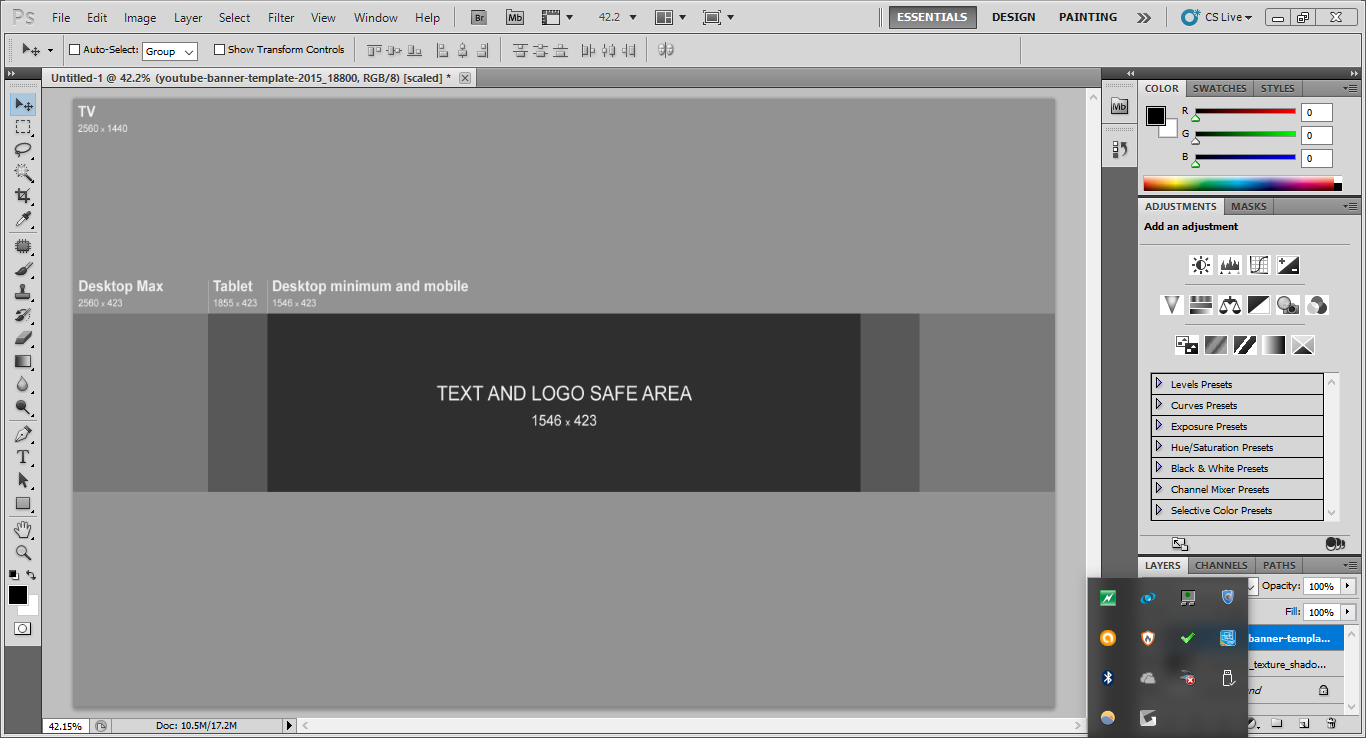
Step Two: Implement your background/insert your template. Attached to this thread is the YouTube banner template. Layer that over your background so you can see what is and isn't going to be visible when you upload your banner.
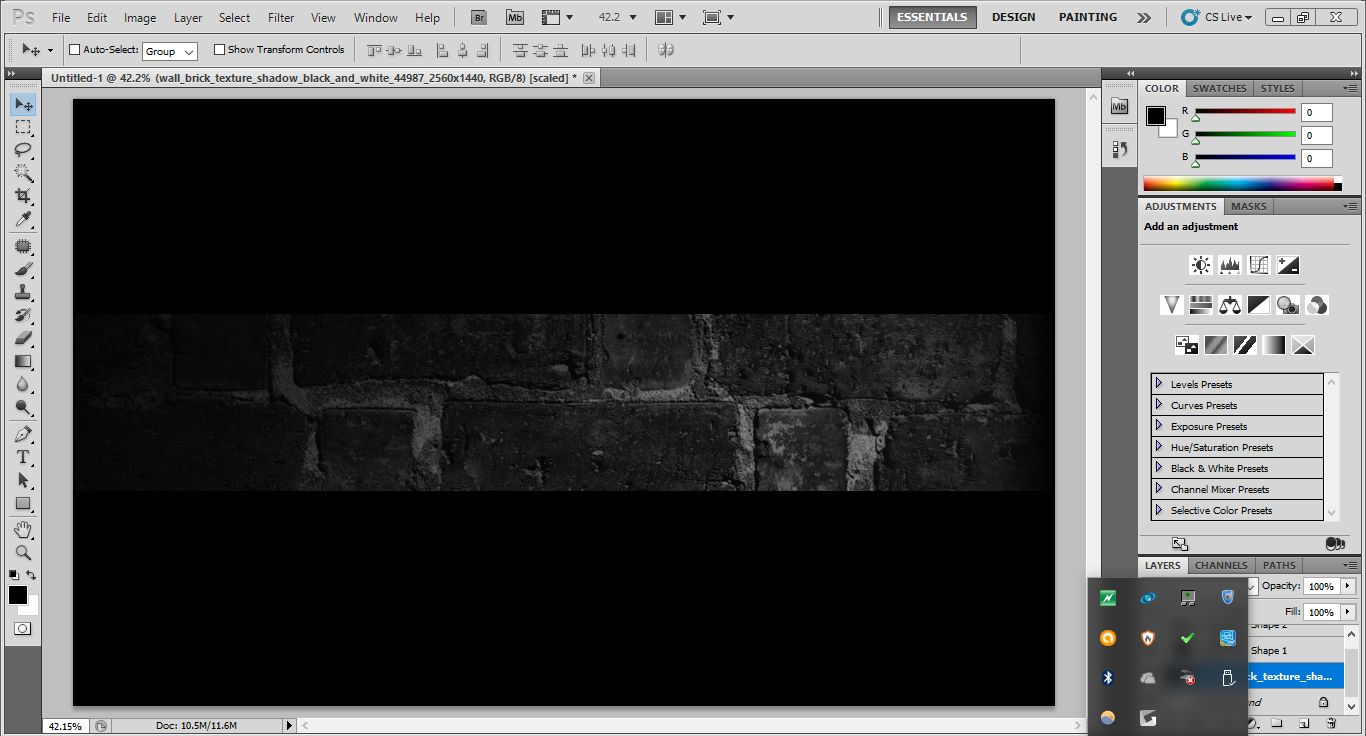
Background:

Background with template:
Step Three: Okay, so you're going to be like "Well now I can't see my background, the template is in the way!"
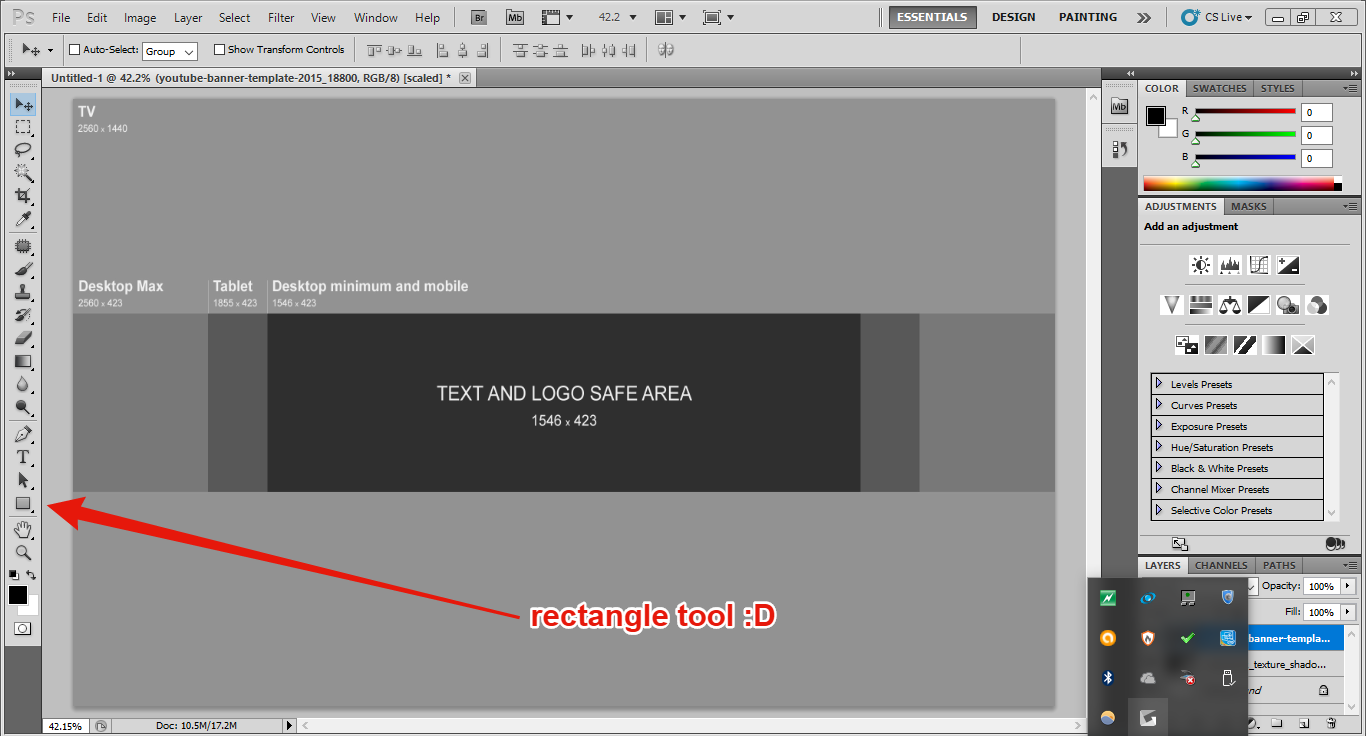
Yes, we are going to fix this! Next, add black bars where there is gray area. Do this using the Rectangle Tool (U).
I'll also show where this tool is located.")
Photo of tool:
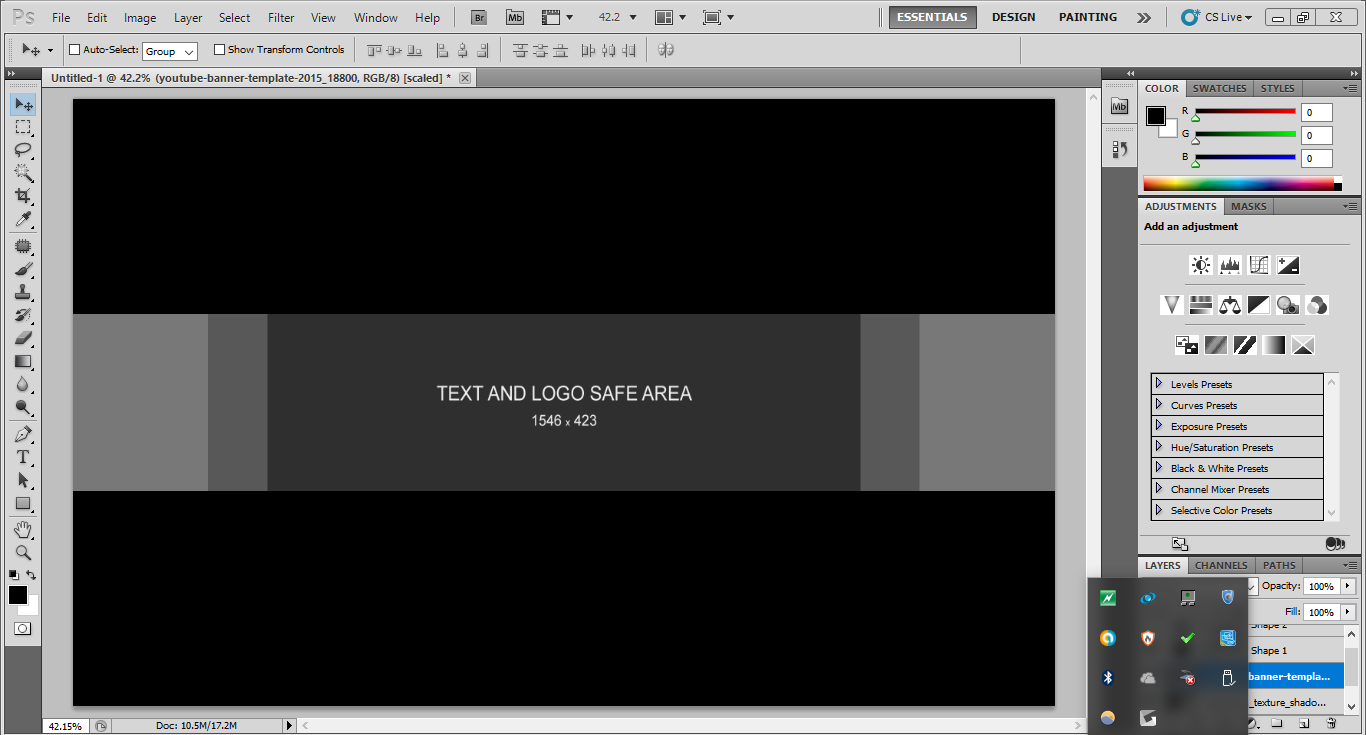
Now, add the black rectangles to cover the grey area.
Should look like this:
Awesome. Now you've created an outline for your banner! Here comes the fun part.
Step Four: Remember that YouTube template? As redundant as it may sound, its time to delete it.
So go to the layer containing the YouTube template, and remove it. After doing so, your background should be revealed in the center BUT the black bars are still going to stay there.
So your project should now look something like this:
Sweet! Now your background is revealed and you can begin making some designs and inserting some titles! Don't delete those black bars yet, though, until you are COMPLETELY done with your banner.
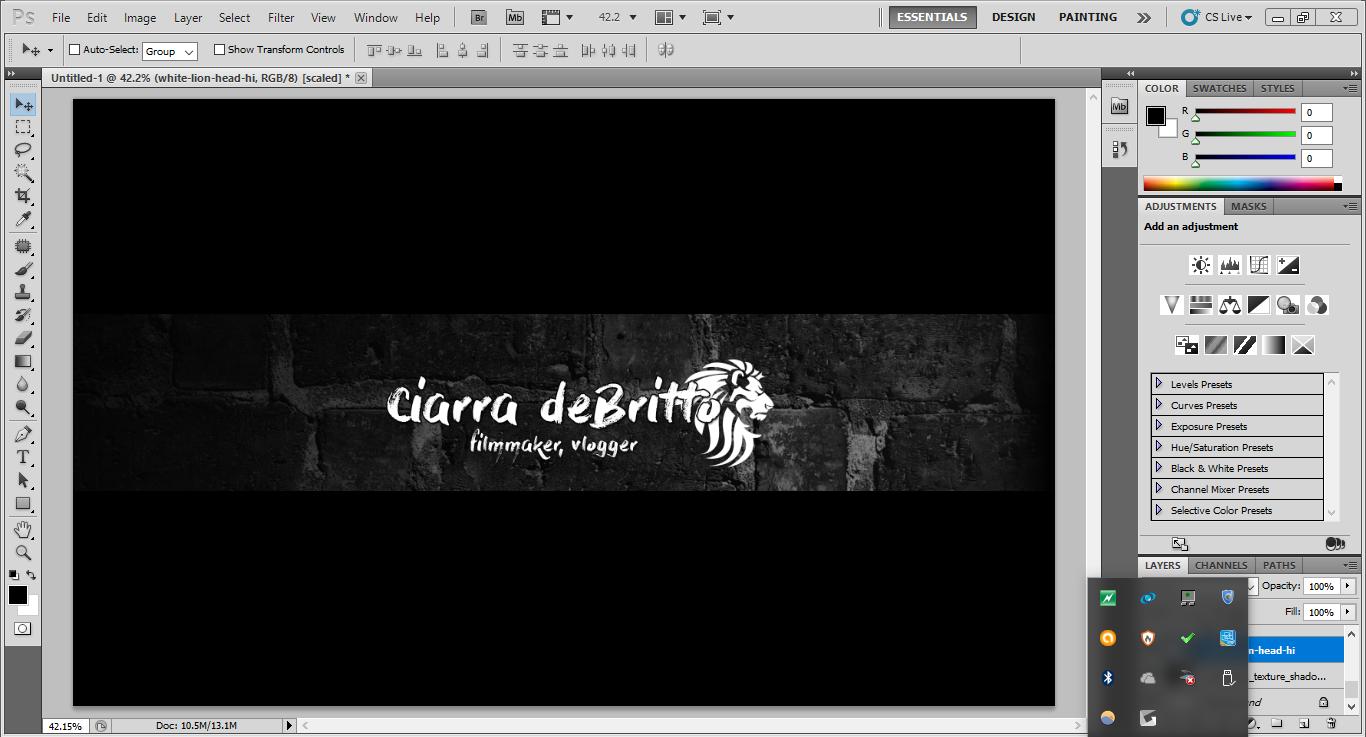
A few minutes later of inserting text, you should have something that looks like this:
I promise, you're almost done.
Step Five: Remove the black bars. They were guidelines. Once removed, export your project, upload it to your supa-awesome channel, and DONE! Now you have a custom made YouTube banner!
I hope this was somewhat helpful for some of you peeps. Have a great rest of your day!
(To the Admins; sorry if I posted this in the wrong place!)
Step One: The resolution of a YouTube banner is recommended to be 2560x1440.
If you do not have Photoshop to open a new project of this size, go on Google and search for a background with those dimensions.
Picture of preset settings:
Step Two: Implement your background/insert your template. Attached to this thread is the YouTube banner template. Layer that over your background so you can see what is and isn't going to be visible when you upload your banner.
Background:
Background with template:
Step Three: Okay, so you're going to be like "Well now I can't see my background, the template is in the way!"
Yes, we are going to fix this! Next, add black bars where there is gray area. Do this using the Rectangle Tool (U).
I'll also show where this tool is located.
Photo of tool:
Now, add the black rectangles to cover the grey area.
Should look like this:
Awesome. Now you've created an outline for your banner! Here comes the fun part.
Step Four: Remember that YouTube template? As redundant as it may sound, its time to delete it.
So go to the layer containing the YouTube template, and remove it. After doing so, your background should be revealed in the center BUT the black bars are still going to stay there.
So your project should now look something like this:
Sweet! Now your background is revealed and you can begin making some designs and inserting some titles! Don't delete those black bars yet, though, until you are COMPLETELY done with your banner.
A few minutes later of inserting text, you should have something that looks like this:
I promise, you're almost done.
Step Five: Remove the black bars. They were guidelines.
Once removed, export your project, upload it to your supa-awesome channel, and DONE! Now you have a custom made YouTube banner!I hope this was somewhat helpful for some of you peeps. Have a great rest of your day!
Attachments
-
 54.1 KB Views: 5
Last edited:


